
New Zealand: 8 Days 7 Nights Itinerary in the South Islands of New Zealand
- Sep 12, 2025
- 8 min read
Updated: Oct 16, 2025


There’s something about the South Island of New Zealand that makes you feel small in the best way possible. Being in Australia already, I decided it was the perfect chance to explore New Zealand. Towering mountains, glassy lakes, roads that never seem to end! I spent 8 days, 7 nights road-tripping with friends in a campervan, chasing hikes, stars, and a whole lot of pies.
Here’s my breakdown of my itinerary


Christchurch Arrival
We flew in a day early and checked into Lylo Christchurch Hotel to get some rest before picking up our campervan bright and early the next day from Madcampers.
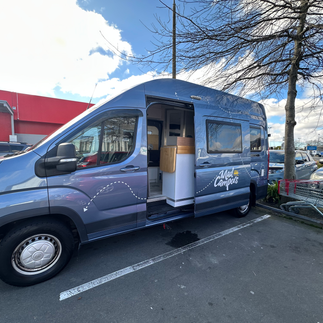
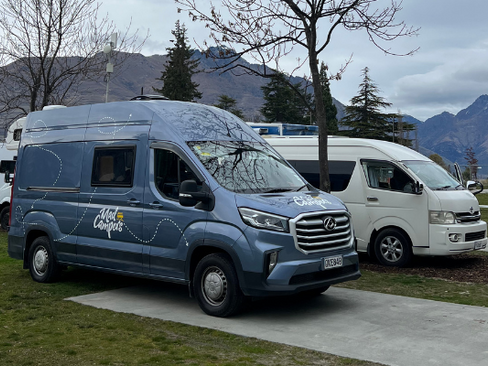
Why I Chose Mad Campers (personal opinion)
When it came to picking a campervan company for our New Zealand road trip, I wanted something that wasn’t just practical, but also felt like it fit the way we travel. Mad Campers stood out compared to the bigger rentals like (Jucy, Maui, Britz, etc) in terms of cost, and layout of the van.
My decision process was based on:
Cost (wanting a great valued price)
Layout and bed orientation of the campervan (I wanted the bed facing the backdoor)
What extras they offered, Madcampers had a winter deal and threw in a heater, fleece blanket, and hot water heating pouches for free.
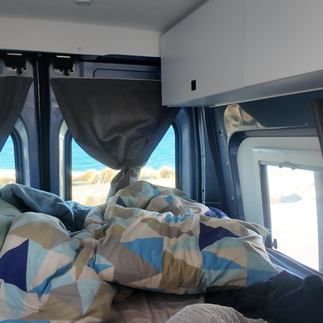
My 8 day hire, 7 nights for 2 people inclusive of the highest insurance cover and road user charges with Madcampers was NZD $1,344 or AUD$1,196 or RM 3,324. Madcampers come with standard bedding (pillowcase, blankets), kitchen equipment and condiments (kettle, pan, pot, coffee plunger, dish soap, salt, pepper, sponge and more) as well as toilet equipment (laundry wash and toilet tabs).
For me, that balance of comfort, convenience, and freedom is exactly why I went with Mad Campers.
What are road user charges?
In New Zealand, the "diesel road tax" is called Road User Charges, which is paid by the kilometre, not the litre. For light diesel vehicles under 3500kg, the current rate is $76 per 1000km, and this is typically included in the rental price by the vehicle rental company.
How it works:
Distance-based: RUC is a charge for every kilometre driven, not a tax on fuel.
Metered: A odometer fitted to the vehicle tracks the distance travelled.
Charged to the consumer: The rental company pays for the RUC but will pass this cost on to the customer, usually integrated into the rental fee.
Some rental companies cover the cost, but it's best to check with the rental provider to understand the hidden fees.


Follow my itinerary:
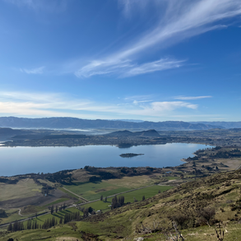
Day 1: Lake Tekapo
Morning started with picking up our campervans — one from Madcamperz, the other from Kitcampers. Then stocked up at Woolworths in Hornby
(Pro tip: do a big grocery shop before hitting the road).
From Christchurch, we drove three and a half hours to Lake Tekapo. On our way to Lake Tekapo, don’t forget to stop by Fairlie Bakehouse for their popular pies!
Highlights of the day:
🛌 Lakes Edge Holiday Park – we stayed in our campervan by the lake!
📍 The Church of the Good Shepherd – iconic, small, and beautiful at sunset.
🥾 Mt John Summit Track – a solid 3-hour walk, with views worth every step.
🌠 Stargazing – Tekapo is part of a Dark Sky Reserve, and the night sky is unlike anything I’ve seen before.
🍔 What to eat
The Greedy Cow Café
The Better Batter for Fish and Chips!


Day 2: Wānaka & Roy’s Peak Prep
We left Lake Tekapo and made our way to Wānaka (about 2.5 hours). The town itself feels more laid-back, with a vibe I really loved.
The day was slow, started with coffee, wandering through town, and snapping the classic photo of That Wānaka Tree.
A light walk to That Wānaka Tree stretched the legs, but the real challenge was waiting… we went to bed early because a 2:30am alarm was set for our big hike: Roy’s Peak.
Highlights of the day:
🛌 Hampshire Holiday Park – we stayed in our campervan by the lake!
📍 That Wānaka Tree – iconic tree in Wānaka
🥾 Waterfall Creek – a light walk from the Wānaka Tree.
🥾 Roys Peak Hike – an advanced hike with beautiful views
🍔 What to eat
Kai Whakapai Eatery & Craft Beer Bar
Big Fig Wanaka
Sofi Bar and Grill


(AM) Day 3: Roy’s Peak Hike
We started Roy’s Peak in the pitch dark at 4:00am. Honestly, the hike was brutal. The track is steep, relentless, and mentally draining. But watching the sunrise over Lake Wānaka from the summit.. it shut me up complaining. That view made every aching step worth it!!!
🥾 Tips to hike Roys Peak 🥾
Start early (really early) – to avoid crowds and hike during cool temperatures
Dress in layers – it’s cold at the base but windy and freezing at the top, then hot on the way down!
Bring a headlamp/torch – If you’re aiming a sunrise hike, then bring a headlamp because the trail is unlit and it gets pitch black
Pack water and light snacks – a banana or some crackers will be a nice treat at the summit!
Wear good shoes and consider the seasons
Summer = hot, exposed, sunburn risk.
Winter = icy, snow at the top, bring spikes.
Know your limit – Roys Peak is not an easy stroll, it’s an incline all the way, and going down is the hardest part (save your knees!) If your body is telling you to take a break, just do it!


(PM) Day 3: Stop at Arrowtown and cont. to Queenstown
On the way to Queenstown, we made a little stop at Arrowtown — honestly, the place is so quaint it reminded me of the Sassafras in Dandenong Ranges, but even cuter. We popped into Royalburn Farm Shop to grab some local groceries before continuing the drive, which was ridiculously scenic the whole way.
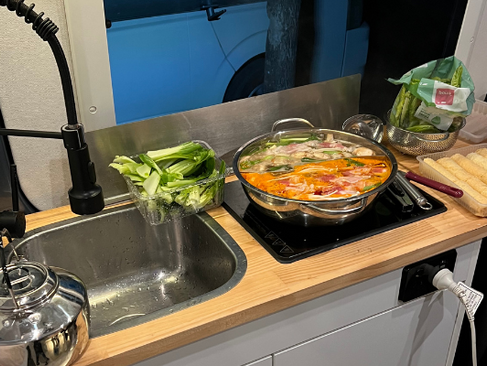
Once we reached Queenstown, we checked into Queenstown Hampshire Holiday Park, stocked up on more supplies, and treated ourselves to a proper hot pot dinner (thanks to an Asian grocer we found in town). After the big Roy’s Peak hike, it was exactly what we needed. We based ourselves here for two nights before moving on.


Day 4: Milford Sound Cruise / Queenstown
We’d been driving so much that we wanted to take the hassle away. So we booked a Milford Sound Cruise day trip with RealNZ for Day 4. So glad we did because this felt like our longest day ever!!
What to expect on the tour
7AM: Walked from Queenstown Hampshire Holiday Park to the RealNZ tour bus (6 minutes walk)
7:30AM – 10:30AM: Caught the coach and made our way to Te Anau for breakfast and toilet break
10AM – 12:40PM: Te Anau to Milford Sounds with scenic stops on the way
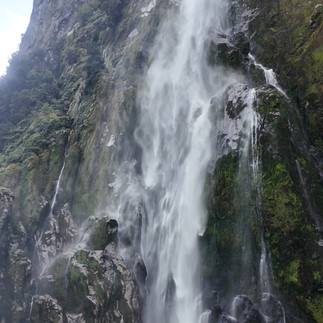
1:00PM – 3:00PM: Arrive to Milford Sounds, get on cruise. We saw waterfalls crashing down cliffs, seals lounging on rocks. It almost felt like I stepped foot in a movie set
3:00PM – 7:00PM: Depart Milford Sounds to go back to Queenstown
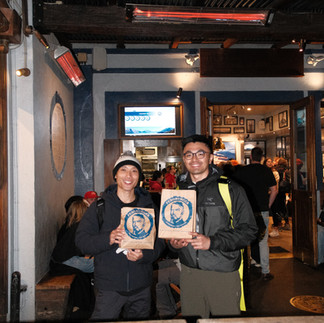
7:00PM – Dinner at the iconic Fergburger,and Patagonia Ice Cream.


Day 5: Glenorchy & Earnslaw Burn Track / Queenstown
From our Queenstown campground, it was a 40-minute drive to Glenorchy, a little town at the edge of Lake Wakatipu that feels vast and cinematic. We hiked the Earnslaw Burn Track, a 4-hour mission with views that honestly felt like a movie set. It’s a quieter alternative to the busier hikes in the South Islands.
TLDR:
🥾 Hiked Earnslaw Burn Track
🛌 After hike, check in at Queenstown Holiday Park Creeksyde for one night.
🍔 Ate dinner at Pog Mahones Irish Pub & Restaurant @ Queenstown
🍦 Had dessert at Mrs Ferg Gelateria


Day 6: Mount Cook/Aoraki (Freedom Camping)
Since we hired a campervan, we were keen to try freedom camping at least once during our trip.
What is Freedom Camping?
Parking your campervan or camping outside of a traditional holiday park or paid campsite.
Often in scenic, natural spots with incredible views.
Rules apply – you can only camp in designated areas.
Most sites require your vehicle to be certified self-contained (toilet, fresh water, and waste facilities).
Helps protect the environment and avoids fines.
We decided to stay at White Horse Hill Campground, an approved camping site managed by the Department of Conservation (DOC) in Aoraki/Mount Cook National Park, New Zealand for the night. It’s tucked away at the base of Mount Cook, and waking up there feels like you’re sleeping in the middle of a postcard. Just a tip – make sure your campervan is fit for freedom camping in the South Island. That means having the right certification (look for the little blue sticker on your van) so you won’t get fined, plus making sure you have enough water, food, and power to last you overnight without plugging in.
Tips for freedom camping
Check for the blue sticker on your campervan (proves self-contained certification).
Always carry enough food, water, and warm clothes – nights can get cold.
Stock up at supermarkets (like Woolies or PakNSave) before heading into remote areas.
Arrive before sunset if possible – campsites can get busy and you’ll want time to settle in.
Leave no trace – take all rubbish with you and respect the environment.
🥾 From our campground, we hiked Kea Point Track and Hooker Valley Track


Day 7: Drive back to Christchurch
After our night at Aoraki/Mount Cook, it was time to make our way back to Christchurch. The drive takes around four to five hours, so started early to ensure we had plenty of time to return the campervan the next day without any stress.
We booked our last night at North South Holiday Park, Christchurch, which was super convenient since it’s located close to the campervan drop-off point and Christchurch Airport. It was nice knowing we could settle in for the evening without having to rush around in the morning.
For our last night in New Zealand, we decided to treat ourselves to dinner in the city. After days of cooking in the campervan, it was refreshing to enjoy a meal out.
Day 8: Return the campervan and catch our flight
Returning the campervan was no stress at all. Just dropped it off at the rental and handed the keys over. Madcampers will then send the final invoice through that includes the remaining payment of the road user charges.
What I would do differently
Looking back on our campervan adventure, it was such a unique way to explore New Zealand! Waking up to mountain views, being surrounded by nature, and having the flexibility to stop almost anywhere along the way. But if I were to do it again, there are definitely a few things I’d change.
Give it more time.
I’d plan for at least two weeks or longer. A week just felt too rushed, especially since so much time is spent driving from place to place. On a future trip, I’d also love to cover both the North and South Islands to get the full experience.
Balance campervan and hotel stays
Living out of a campervan was fun, but the daily routine of packing up in the morning and setting everything back up at night got tiring fast. It would be nice to mix it up with a few nights in hotels. That way, I’d get the comfort of a proper bed and less hassle, while still enjoying the freedom of van life. (This time, I skipped it mainly because of budget.)
Do more non-mainstream hikes
New Zealand is packed with famous trails like Hooker Valley, but it’s also home to many hidden gems. Next time, I’d set aside whole days to explore lesser-known hikes and trails, since that’s when you really get to experience the true beauty of the country.
Overall, the campervan trip was unforgettable, but I’ve realised that New Zealand is a place you can’t fully rush through. It deserves time, space, and slower days to really take it all in.


Comments